
Is your vehicle’s engine performance not quite up to par? Are you experiencing issues with starting, rough idling, or decreased fuel efficiency? If so, the culprit might be hiding right under your hood – the air intake temperature sensor. This unsung hero plays a crucial role in ensuring your engine operates optimally. In this blog post, we’ll delve into the world of the air intake temperature sensor, exploring the symptoms of a bad one, its potential causes, how to diagnose it, fixes, and precautions to keep your engine running smoothly.
Table of Contents
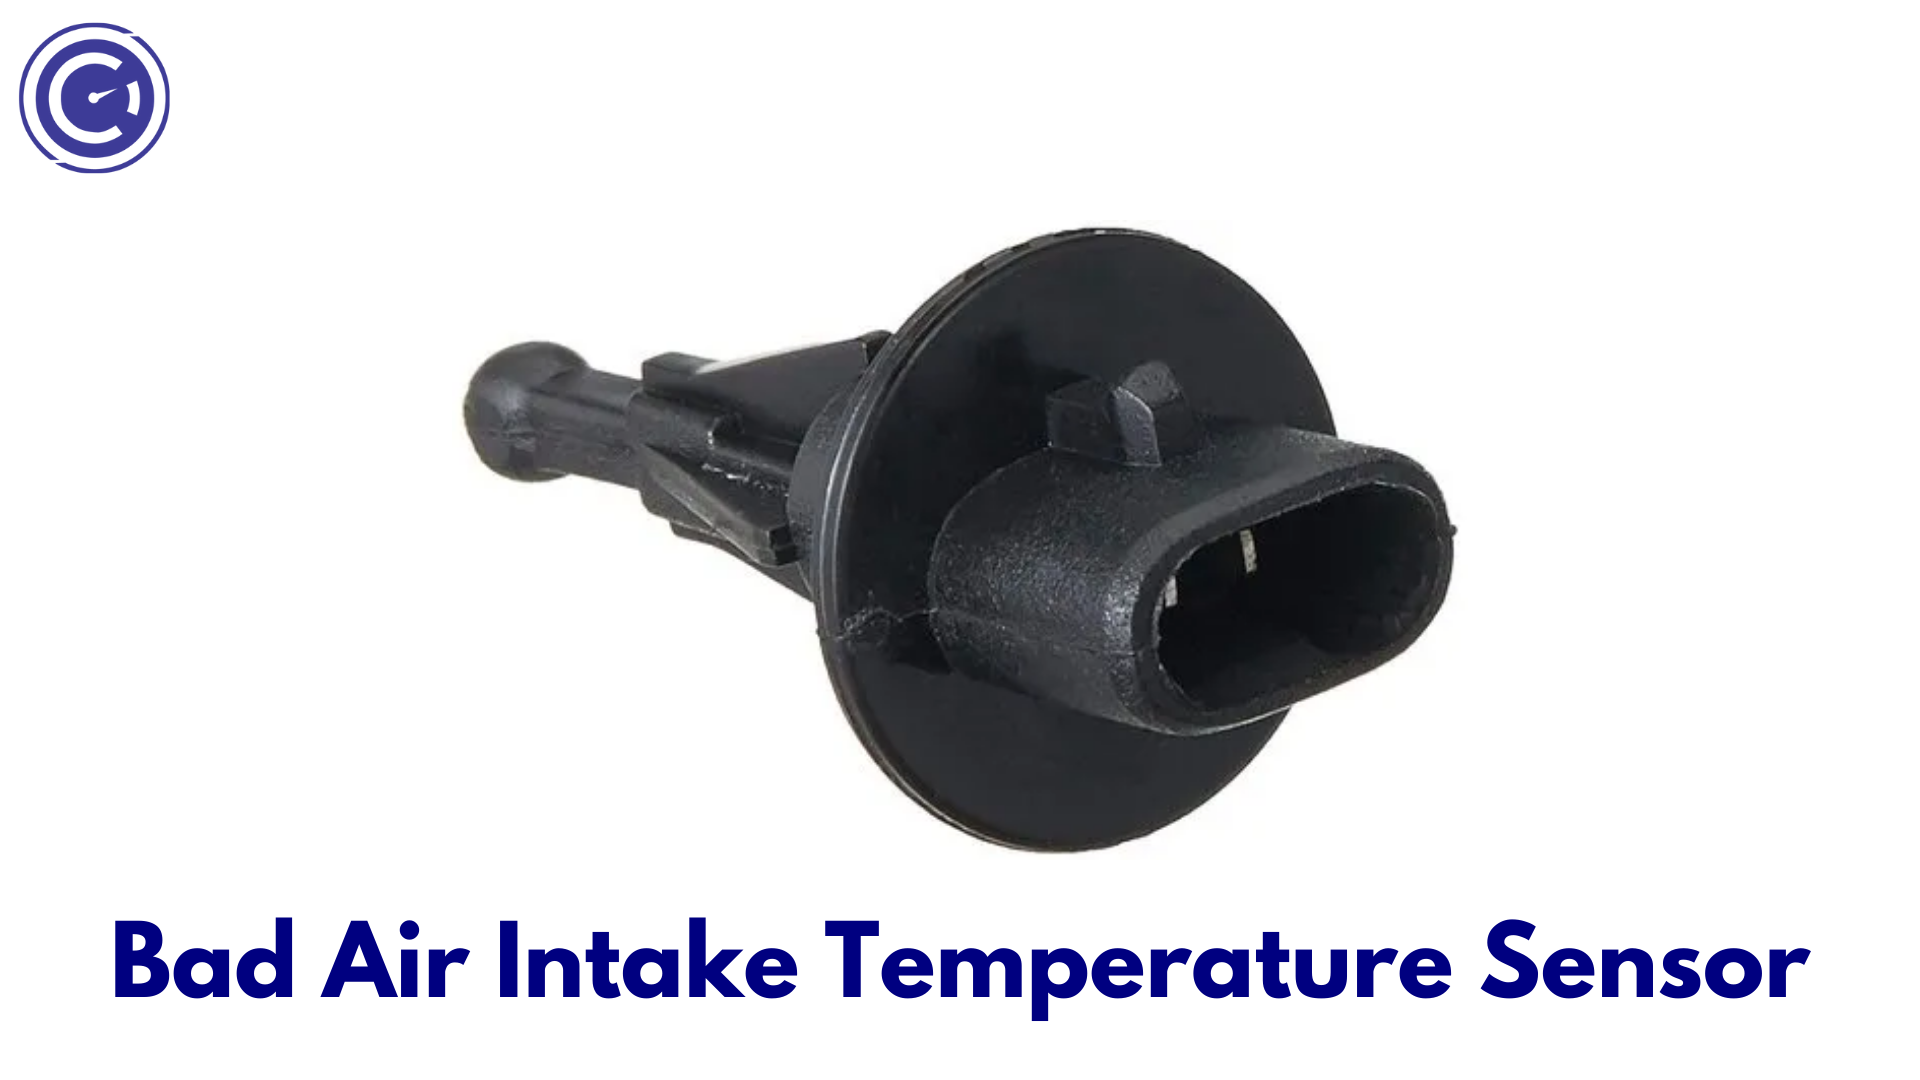
Introduction: The Sensor That Matters
Before we dive into the symptoms, let’s understand the significance of the air intake temperature sensor. This small but mighty component monitors the temperature of the incoming air to your engine. Why does this matter? Because the temperature of the air affects the air-to-fuel ratio, which, in turn, impacts engine performance and efficiency. In simpler terms, the air intake temperature sensor helps your engine adjust to varying conditions, ensuring it runs at its best.
Symptoms of a Bad Air Intake Temperature Sensor
The air intake temperature sensor (AIT sensor) is an important component of a vehicle’s engine management system. When this sensor starts failing or becomes faulty, it can cause various symptoms that affect the performance and efficiency of the engine. Here are some common symptoms of a bad air intake temperature sensor:
Poor Fuel Economy

A faulty AIT sensor can lead to incorrect readings of the air temperature, which in turn can cause the engine control unit (ECU) to miscalculate the fuel-air mixture. This often results in a richer mixture, causing the engine to use more fuel than necessary.
Rough Engine Idle
When the AIT sensor fails, it can send incorrect information to the ECU, leading to an imbalance in the air-fuel mixture. This imbalance can cause the engine to idle roughly, or even stall in some cases.
Difficulty Starting the Engine
If the AIT sensor provides inaccurate temperature readings, especially during cold starts, the engine might have difficulty starting. This is because the ECU may not enrich the fuel mixture appropriately for the actual ambient temperature.
Check Engine Light
A common symptom of a faulty AIT sensor is the illumination of the check engine light on the dashboard. This occurs when the ECU detects an issue with the sensor’s readings and logs an error code.
Poor Engine Performance

Incorrect air temperature readings can affect the engine’s timing and fuel delivery, leading to reduced performance. This might manifest as sluggish acceleration, hesitation during throttle application, or a general lack of power.
Engine Overheating
In rare cases, a bad AIT sensor can cause the engine to overheat. This is usually due to the ECU not adjusting the fuel-air mixture correctly, leading to inefficient combustion and increased engine temperature.
Increased Emissions

A faulty AIT sensor can lead to higher emissions. Incorrect air temperature readings can cause incomplete combustion, resulting in an increase in harmful exhaust gases like carbon monoxide and unburned hydrocarbons.
It’s important to diagnose and address issues with the air intake temperature sensor promptly, as prolonged issues can lead to more serious engine problems and decreased vehicle performance.
Potential Causes of a Bad Air Intake Temperature Sensor
The air intake temperature (AIT) sensor is a critical component in a vehicle’s engine, and several factors can lead to its malfunction or failure. Understanding these potential causes can help in diagnosing and fixing issues related to the AIT sensor. Here are some common causes:
Dirt and Debris Accumulation

Over time, the AIT sensor can get coated with dirt, oil, or other contaminants. This build-up can interfere with its ability to accurately measure the air temperature entering the engine.
Wiring or Connection Issues
Faulty or damaged wiring, or poor connections, can lead to intermittent or incorrect signals being sent from the AIT sensor to the engine control unit (ECU). Corrosion, frayed wires, or loose connectors are common culprits.
Thermal Stress and Aging
The AIT sensor is exposed to significant temperature fluctuations, which can cause wear and tear over time. Prolonged exposure to high temperatures can degrade the sensor’s components, leading to failure.
Water or Moisture Damage

If water, coolant, or other fluids come into contact with the AIT sensor, it can cause short circuits or corrosion. This is often due to leaks or spills in the engine bay.
Faulty Manufacturing or Material Defects
In some cases, the AIT sensor itself might be of poor quality or have defects from the manufacturing process. This can lead to premature failure or inaccurate readings.
Electrical Interference
External electrical interference or a malfunctioning ECU can disrupt the signals from the AIT sensor, causing inaccurate temperature readings.
Physical Damage
The AIT sensor can be damaged by physical impact, such as during engine repairs, accidents, or due to debris hitting the sensor. This can disrupt its functionality.
Improper Installation
If the AIT sensor is not installed correctly, it might not function as intended. This could be due to incorrect positioning, not securing it properly, or not ensuring a good electrical connection.
Regular maintenance and inspections can help identify and prevent potential issues with the air intake temperature sensor. If a problem is suspected, it’s advisable to have the vehicle checked by a professional to avoid further engine performance issues.
Diagnosis of a Bad Air Intake Temperature Sensor
Diagnosing a bad air intake temperature (AIT) sensor involves a series of steps to confirm whether the sensor is malfunctioning and to identify the root cause of the problem. Here’s a structured approach to diagnose a faulty AIT sensor in a vehicle:
Visual Inspection
- Check for Physical Damage: Inspect the AIT sensor for any signs of physical damage, such as cracks or breaks.
- Examine Wiring and Connectors: Look for any damaged or frayed wires, loose connections, or signs of corrosion around the sensor and its connector.
Check for Trouble Codes
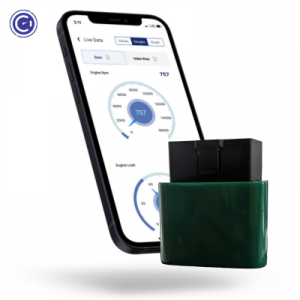
- Use an OBD-II Scanner: Connect the GaragePro OBDII scanner to the vehicle’s diagnostic port to read any trouble codes stored in the engine control unit (ECU). Codes related to the AIT sensor can indicate issues with the sensor’s performance.
Perform a Resistance Test
- Use a Multimeter: Disconnect the sensor and use a multimeter to measure its resistance. Compare the measured resistance with the specifications provided in the vehicle’s service manual. Resistance that is significantly higher or lower than specified can indicate a faulty sensor.
Test Sensor Response
- Measure Resistance at Different Temperatures: Check the sensor’s resistance at various temperatures. You can do this by measuring resistance at ambient temperature and then heating the sensor with a hair dryer or heat gun and measuring again. The resistance should change predictably with temperature changes.
Inspect the Air Intake System
- Check for Air Leaks: Inspect the air intake system for any leaks, as they can cause inaccurate readings.
- Clean the Sensor: If the sensor is dirty, carefully clean it and retest its performance.
Evaluate Engine Performance
- Monitor Engine Behavior: Pay attention to the engine’s performance, especially during idling and acceleration. Inconsistent performance can be a sign of sensor issues.
Consult Vehicle-Specific Information
- Refer to Service Manual: Each vehicle may have specific diagnostic procedures for the AIT sensor. Always consult the service manual for the correct procedures and specifications.
Professional Diagnosis
- Seek Expert Help: If you are unable to diagnose the issue or if the diagnosis is inconclusive, consider taking the vehicle to a professional mechanic.
Remember, accurate diagnosis of a bad AIT sensor is crucial to ensure the correct repairs are made and to avoid unnecessary replacements. If you are not confident in performing these diagnostics, it is advisable to seek assistance from a qualified technician.
Fixes for a Bad Air Intake Temperature Sensor
Fixing a bad air intake temperature (AIT) sensor involves a few potential solutions, ranging from cleaning the sensor to replacing it entirely. Here’s a structured approach to addressing issues with an AIT sensor:
Cleaning the Sensor

- If the sensor is dirty or covered in debris, carefully clean it using appropriate cleaning solutions (like electronic or sensor cleaner) and a soft brush or cloth. Avoid using harsh chemicals that can damage the sensor.
Repairing or Replacing Wiring and Connectors
- Inspect the wiring and connectors leading to the AIT sensor. If they are damaged, frayed, or corroded, they should be repaired or replaced to ensure a proper electrical connection.
Sensor Re-calibration
- In some vehicles, the AIT sensor can be recalibrated. Refer to the vehicle’s service manual for specific instructions on recalibration, as this process can vary depending on the make and model of the vehicle.
Replacing the Sensor
If the sensor is faulty and cannot be repaired, it will need to be replaced. Here are the steps for sensor replacement:
- Purchase the Correct Replacement: Ensure you have the correct replacement sensor for your vehicle model.
- Remove the Old Sensor: Disconnect the sensor’s electrical connector and unscrew or unclip the old sensor from its mount.
- Install the New Sensor: Place the new sensor in the mount, secure it, and reconnect the electrical connector.
- Ensure Proper Installation: Double-check that the sensor is securely installed and the connector is properly attached.
Check for Software Updates
- In some modern vehicles, software updates for the engine control unit (ECU) can resolve issues related to sensor readings. Check if there are any updates available for your vehicle’s ECU.
Reset the Engine Control Unit (ECU)
- After replacing the sensor, it may be necessary to reset the ECU to clear any error codes and allow it to recalibrate to the new sensor. This can often be done by disconnecting the vehicle’s battery for a short period.
Professional Installation
- If you are not confident in performing the replacement yourself, or if the issue persists after your attempts to fix it, seek professional assistance. A qualified mechanic can ensure the sensor is correctly installed and functioning as intended.
Remember, the exact process for fixing an AIT sensor can vary depending on the make and model of your vehicle. Always refer to your vehicle’s service manual for specific guidance. Additionally, take appropriate safety precautions when working on your vehicle to avoid injuries or further damage.
Precautions: Keep Your Sensor Healthy
Maintaining the health of your vehicle’s sensors, including the air intake temperature (AIT) sensor, is crucial for ensuring optimal engine performance and longevity. Here are some key precautions and maintenance tips to keep your AIT sensor in good condition:
Regular Cleaning
- Keep the AIT sensor clean. Periodically inspect and clean the sensor to remove any dirt, oil, or debris that may have accumulated. Use sensor-safe cleaners and a gentle brush or cloth to avoid damaging the sensor.
Avoid Contaminants
- Be cautious about exposing the sensor to potential contaminants. This includes avoiding spilling oil, coolant, or other fluids in the engine bay. If you’re working on your vehicle, be mindful of where fluids are and where they’re being placed.
Check the Air Filter
- Regularly check and replace the air filter as needed. A dirty or clogged air filter can lead to increased debris and contaminants in the air intake system, which can eventually affect the AIT sensor.
Inspect Wiring Regularly
- Periodically check the wiring and connectors associated with the AIT sensor. Look for signs of wear, damage, or corrosion and address any issues promptly. Ensure connectors are secure and free from corrosion.
Be Cautious with Engine Cleaning
- When cleaning the engine or engine bay, be careful with water and cleaning agents around the sensor. Cover the sensor or avoid direct spraying to prevent water or chemical ingress.
Follow Proper Installation Procedures
- If you need to replace or reinstall the AIT sensor, ensure that it is done correctly. Follow the vehicle manufacturer’s guidelines for installation, ensuring that the sensor is properly seated and the electrical connections are secure.
Regular Vehicle Maintenance
- Adhere to regular vehicle maintenance schedules as recommended by the manufacturer. Routine checks by a professional can help in early identification of issues with sensors and other engine components.
Use Quality Replacement Parts
- If replacement of the AIT sensor is necessary, opt for quality parts that meet OEM standards. Avoid using substandard or incorrect sensors, as they can lead to poor performance and further issues.
Avoid Unnecessary Modifications
- Be cautious with aftermarket modifications that can impact the air intake system. Some modifications may affect the functioning of the AIT sensor or lead to inaccurate readings.
Monitor Engine Performance
- Pay attention to your vehicle’s performance. Changes in fuel efficiency, engine behavior, or the appearance of warning lights should prompt a check-up, potentially including sensor inspection.
By following these precautions and being proactive about maintenance, you can significantly reduce the likelihood of issues with your AIT sensor
In conclusion, the air intake temperature sensor may be small, but its impact on engine performance is significant. Understanding its symptoms, causes, diagnosis, fixes, and precautions will help you keep your engine running smoothly and efficiently. So, the next time you notice your engine behaving strangely, remember to shed some light on the air intake temperature sensor—it might be the key to getting your car back on the road with improved performance.